
Create Purchase Order
Mobile users who are making purchases in the field for items related to their work can do so using a Purchase Order Number. A Purchase Order Number can be obtained in the mobile device by creating a Purchase Order. To start this process, you will click on the Create Purchase Order button on the Work Order screen.
Purchase Orders may have limits that can be set on the web side of the software including restrictions as to who can create a purchase order and how much money they can spend.
In addition, a project exemption certificate might be in place that needs to be considered. If this is the case, a special screen will be displayed by the mobile stating that the job is Project Exempt, and the mobile user should inform the Vendor the fact. Being Project Exempt is NOT the same as being Tax Exempt. No NOT tell the vendor that you are Tax Exempt if you see a Project Exemption warning. Being Tax Exempt means that your company NEVER pays tax. A project Exemption means that only the supplied being purchased for the current job are to be purchases tax free.
Nearest Vendor
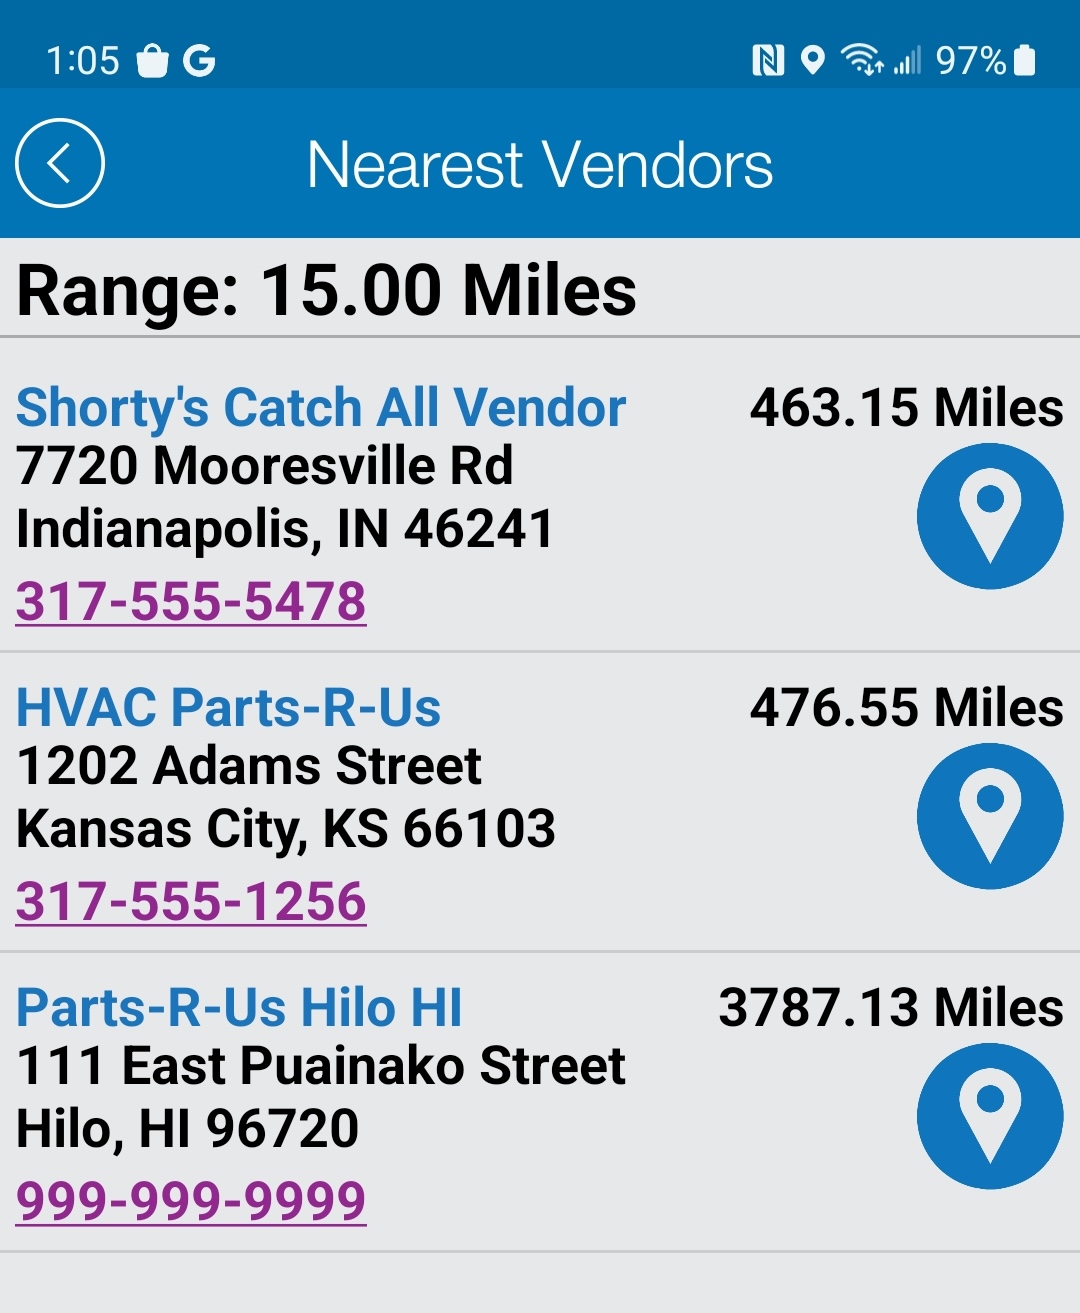
When you start a PO, you will be asked to select the vendor you are purchasing from. It is important that you select the correct vendor. Generally, you are going to be in or outside the location where you intend to buy your item(s) from. The exception will be if you are ordering items by phone. The phone will list the vendors on the Select Vendor screen according to the distance the vendor is located to the current location of the mobile device.
This process of starting a PO and selecting a vendor might be limited to the location of the device and the distance to the vendor your buying from. If you are placing a phone order, you will most likely have to start that process by navigating to the Locate Vendor button on the Work Order screen.
Vendor Location
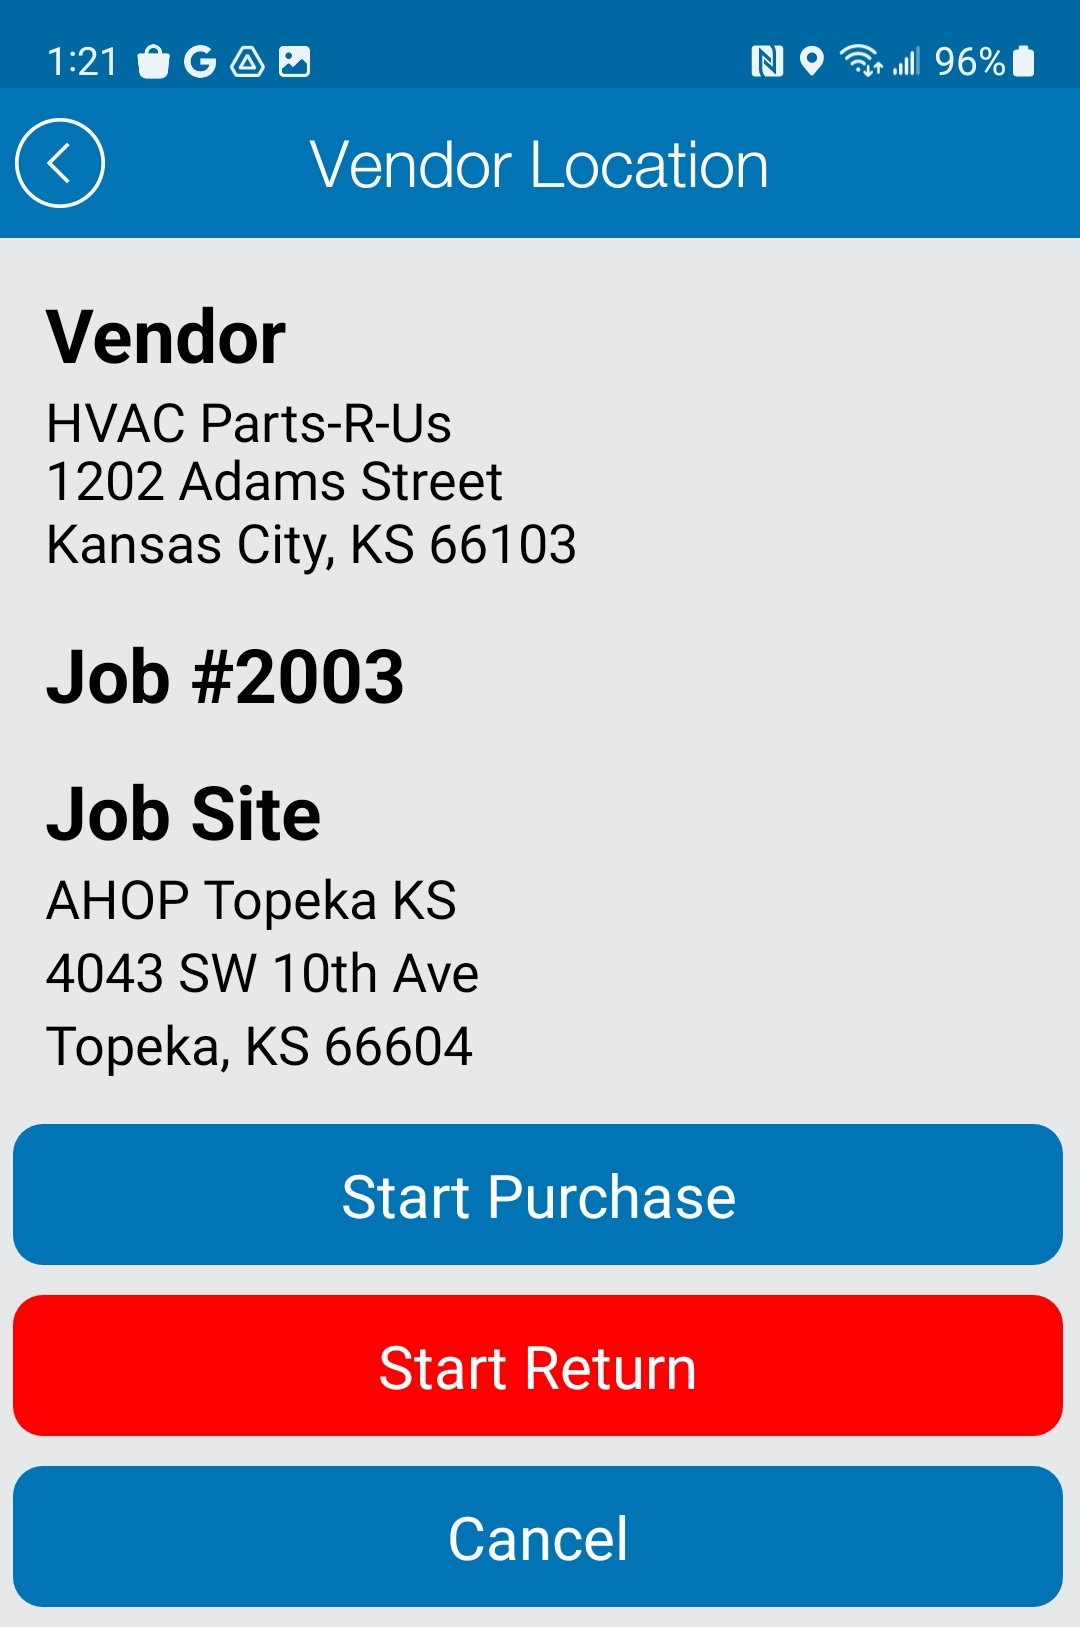
Once you have selected a vendor from the list, you will be taken to the Vendor Location screen to verify the vendor that you have selected. The system will also verify the current job number you are clocked into and the Job Site location. At the bottom of the screen, you will need to select either to start a purchase or a return.
Please note that you can NOT enter a return item and a purchase item on the same ticket. You need to do returns separately from your purchases even if they are both being exchanged at the same location. Complete the Return Order and then start a new Purchase Order separately.
Project Exempt Job
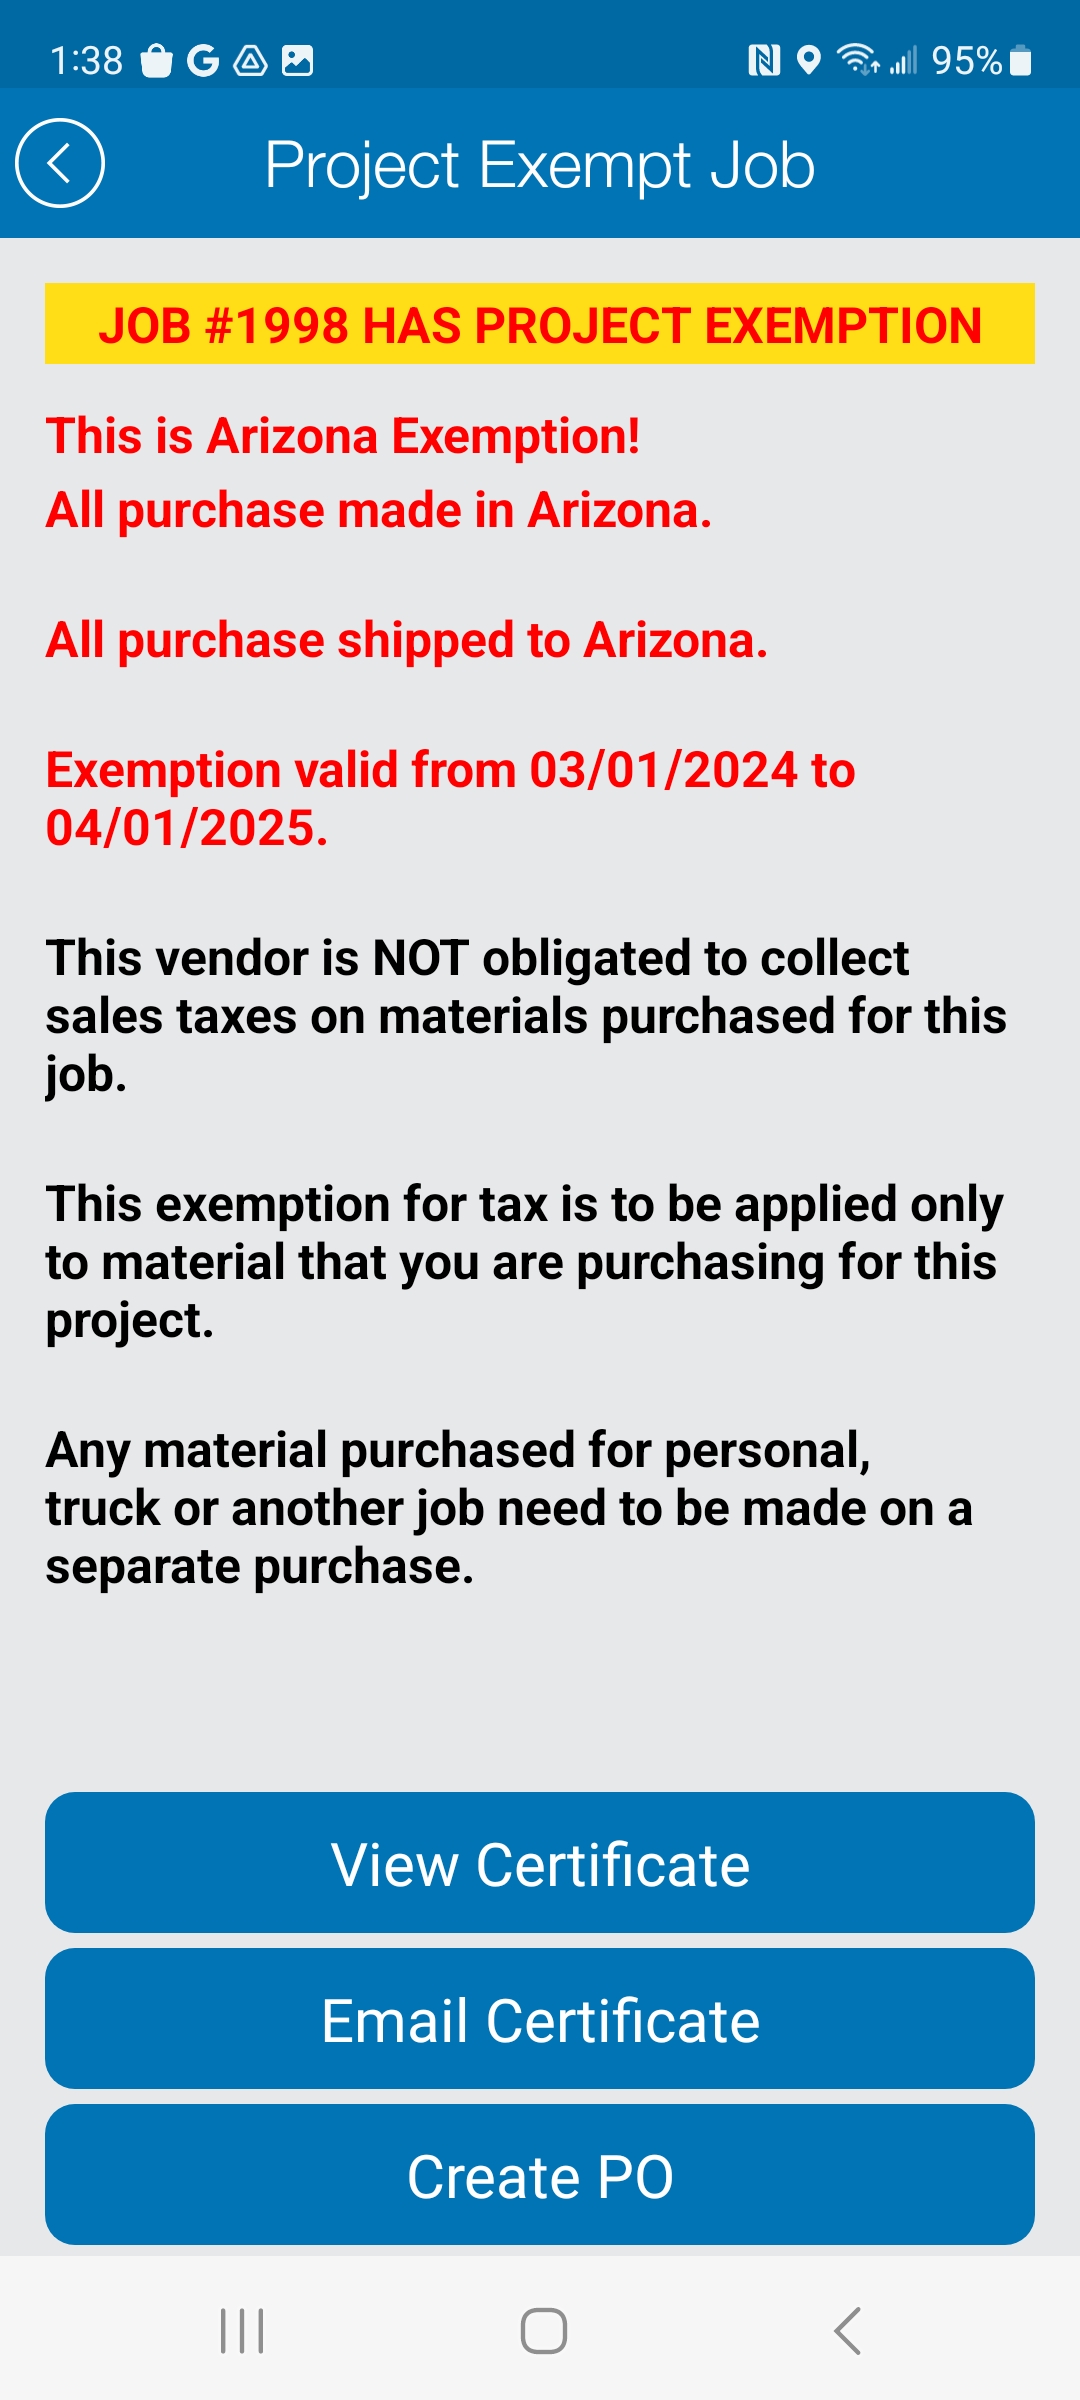
If you are working on a job that has been marked as project exempt, this means that you DO NOT pay tax when you buy things in the field for this job. Project Exemptions are only valid for materials purchased for work being performed related to the job marked project exempt. When you click on the Start Purchase button, IF your job is exempt, the mobile will display a Project Exempt screen notifying you that the job your clocked into has a valid project exemption in place that you will have to notify the vendor about.
PLEASE NOTE AND REMEMBER THAT PROJECT EXEMPT AND TAX EXEMPT ARE NOT THE SAME. YOU NEVER WANT TO TELL A VENDOR THAT YOU ARE TAX EXEMPT Being tax exempt means that your company does not pay taxes ever. This will never be the case. Being PROJECT EXEMPT means we have a special certificate from the Client that allows us NOT to pay taxes for a limited amount of time on items purchased related to a specific project. You NEVER want to assume a job is exempt, if the job is exempt, you will be notified by the system when you create a purchase order.
The project exempt screen will tell you everything you need to know about the exemption and give you tools to help you and the vendor. At the top of the screen the system will tell you what state the exemption is good for. Exemptions are typically valid for all purchases made in the state issued. IF you are making purchases from a vendor that does not reside in the state listed and you are picking up these parts in person in that state, you should NOT use the exemption as the items you are buying will NOT be exempt.
The next piece of info the system will tell you is when the exemption is valid. Items must be purchased between the start and end time of the exemption. Anything bought before or after the issued start and end will NOT be exempt.
At the bottom of the screen will be three buttons. The first allows you to view the exemption on your phone so you may show it to the vendor if physically buying items in person. The second button is there to allow you to Email Certificate to the vendor. Clicking the Email button will ask you to enter an email address and the system send an email to the address collected with a copy of the exemption attached. The third button allows you to start your PO by entering items. Once you have notified the vendor of the exemption, you will need to click the Create PO button to start entering your item(s).
Adding Items
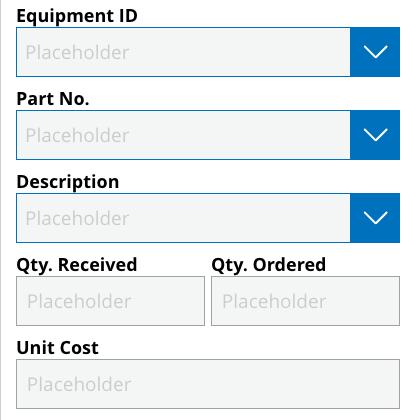
Once you have defined a return or purchase, you will be asked to add items. It is important that you enter at minimum the single most expensive item you are purchasing to the mobile. The system does not require you to enter all items for your purchase, however it is most helpful in several ways that you enter the most expensive item at a minimum when creating a new Purchase Order. Choose the equipment you are buying for, enter the Part No or item name, and a description.
Under the quantity ordered and received, you are defining how many you are physically getting vs what you are paying for. In certain instances, you may pay for more quantity than you received. Examples would be if an item is backordered due to low stock or if you are purchasing over the phone. In those cases, you might order multiple and receive none or a limited number. You will need to state as such so the system and the Contractor know that you did not get all that you paid for and a follow up will be necessary.
The unit cost is how much the item is before tax. If you are not going to list all the item you are buying in the mobile order, you need to enter the subtotal for all you are buying under the PO in the item cost. This will help the system and Contractor know that while you did not list all the items, the cost of all the items will still be reflected in the system.
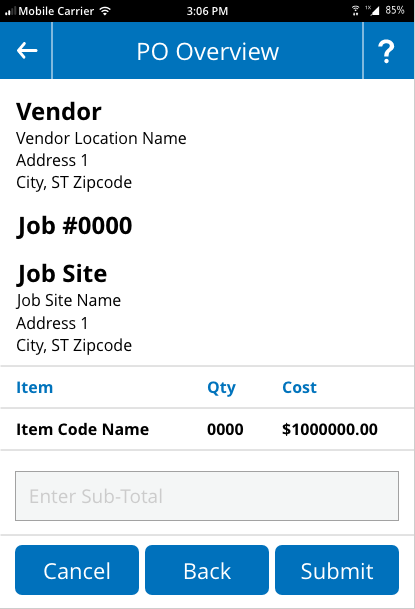
PO Overview
Once you have entered your item(s) on the Add Items screen you will click the Done button and you will be taken to the PO Overview screen. Here you will see a list of the items entered the mobile for the PO and the system will ask you to enter the Sub-Total (Before Tax) of your total purchase. If this sub-total does not match the sub-total of all the items entered, the system will prompt you to go back and edit your item costs until they match. The cost of all items entered combined must equal the sub-total entered on the PO Overview screen. Once you have entered an excepted number, you will click the Submit button.
Submit Purchase Order
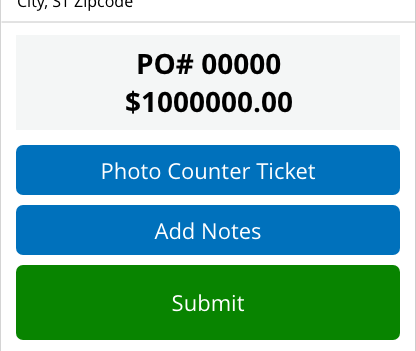
Upon successful upload of your items, the system will show you the Submit PO screen. Here you will see your Vendor Data, Job number, Job Site name and a PO Number that has been issued by the system along with the purchase amount sub-total.
At this point you will need to take a picture of the counter ticket or receipt and upload it before the system will allow you to leave this screen. Click the Photo Counter Ticket button and take a picture of the ticket/receipt using the mobile device camera. Once this has been uploaded the Submit button will turn green allowing you to leave the PO.
In addition to photographing the counter ticket, you can add notes to the PO. Notes are NOT required but can be helpful if there is anything you think the Contractor needs to know about your purchase. You might need to add notes if you have items on back order or waiting to be picked up later.
Go Back
